
Creating a Store
Open a store, then work through the six onboarding steps to launch it.
The Stores page lists every store you own or belong to.
Dashboard → Stores. Any account can create a store; no permission needed.
Before you start
Verification stalls without three things:
- Payout details: bank account information, or a PayPal address if your store is in USD.
- Your Tax ID, or the equivalent local documentation.
- A valid, unexpired government-issued photo ID: passport, driver's licence, national ID card or residence permit.
You must be 18 or over to verify. Under 18, a parent or guardian has to create the account and verify in their own name; contact support@paynow.gg to transfer it once you turn 18, rather than changing the name on a verified account.
Create the store
- Click Create Store in the top-right corner.
- Enter a Store Name.
- Enter a Slug.
- Select your Currency.
- Choose your platform and integration type.
- Enter your Support Email and Contact Email.
- Click Create Store.
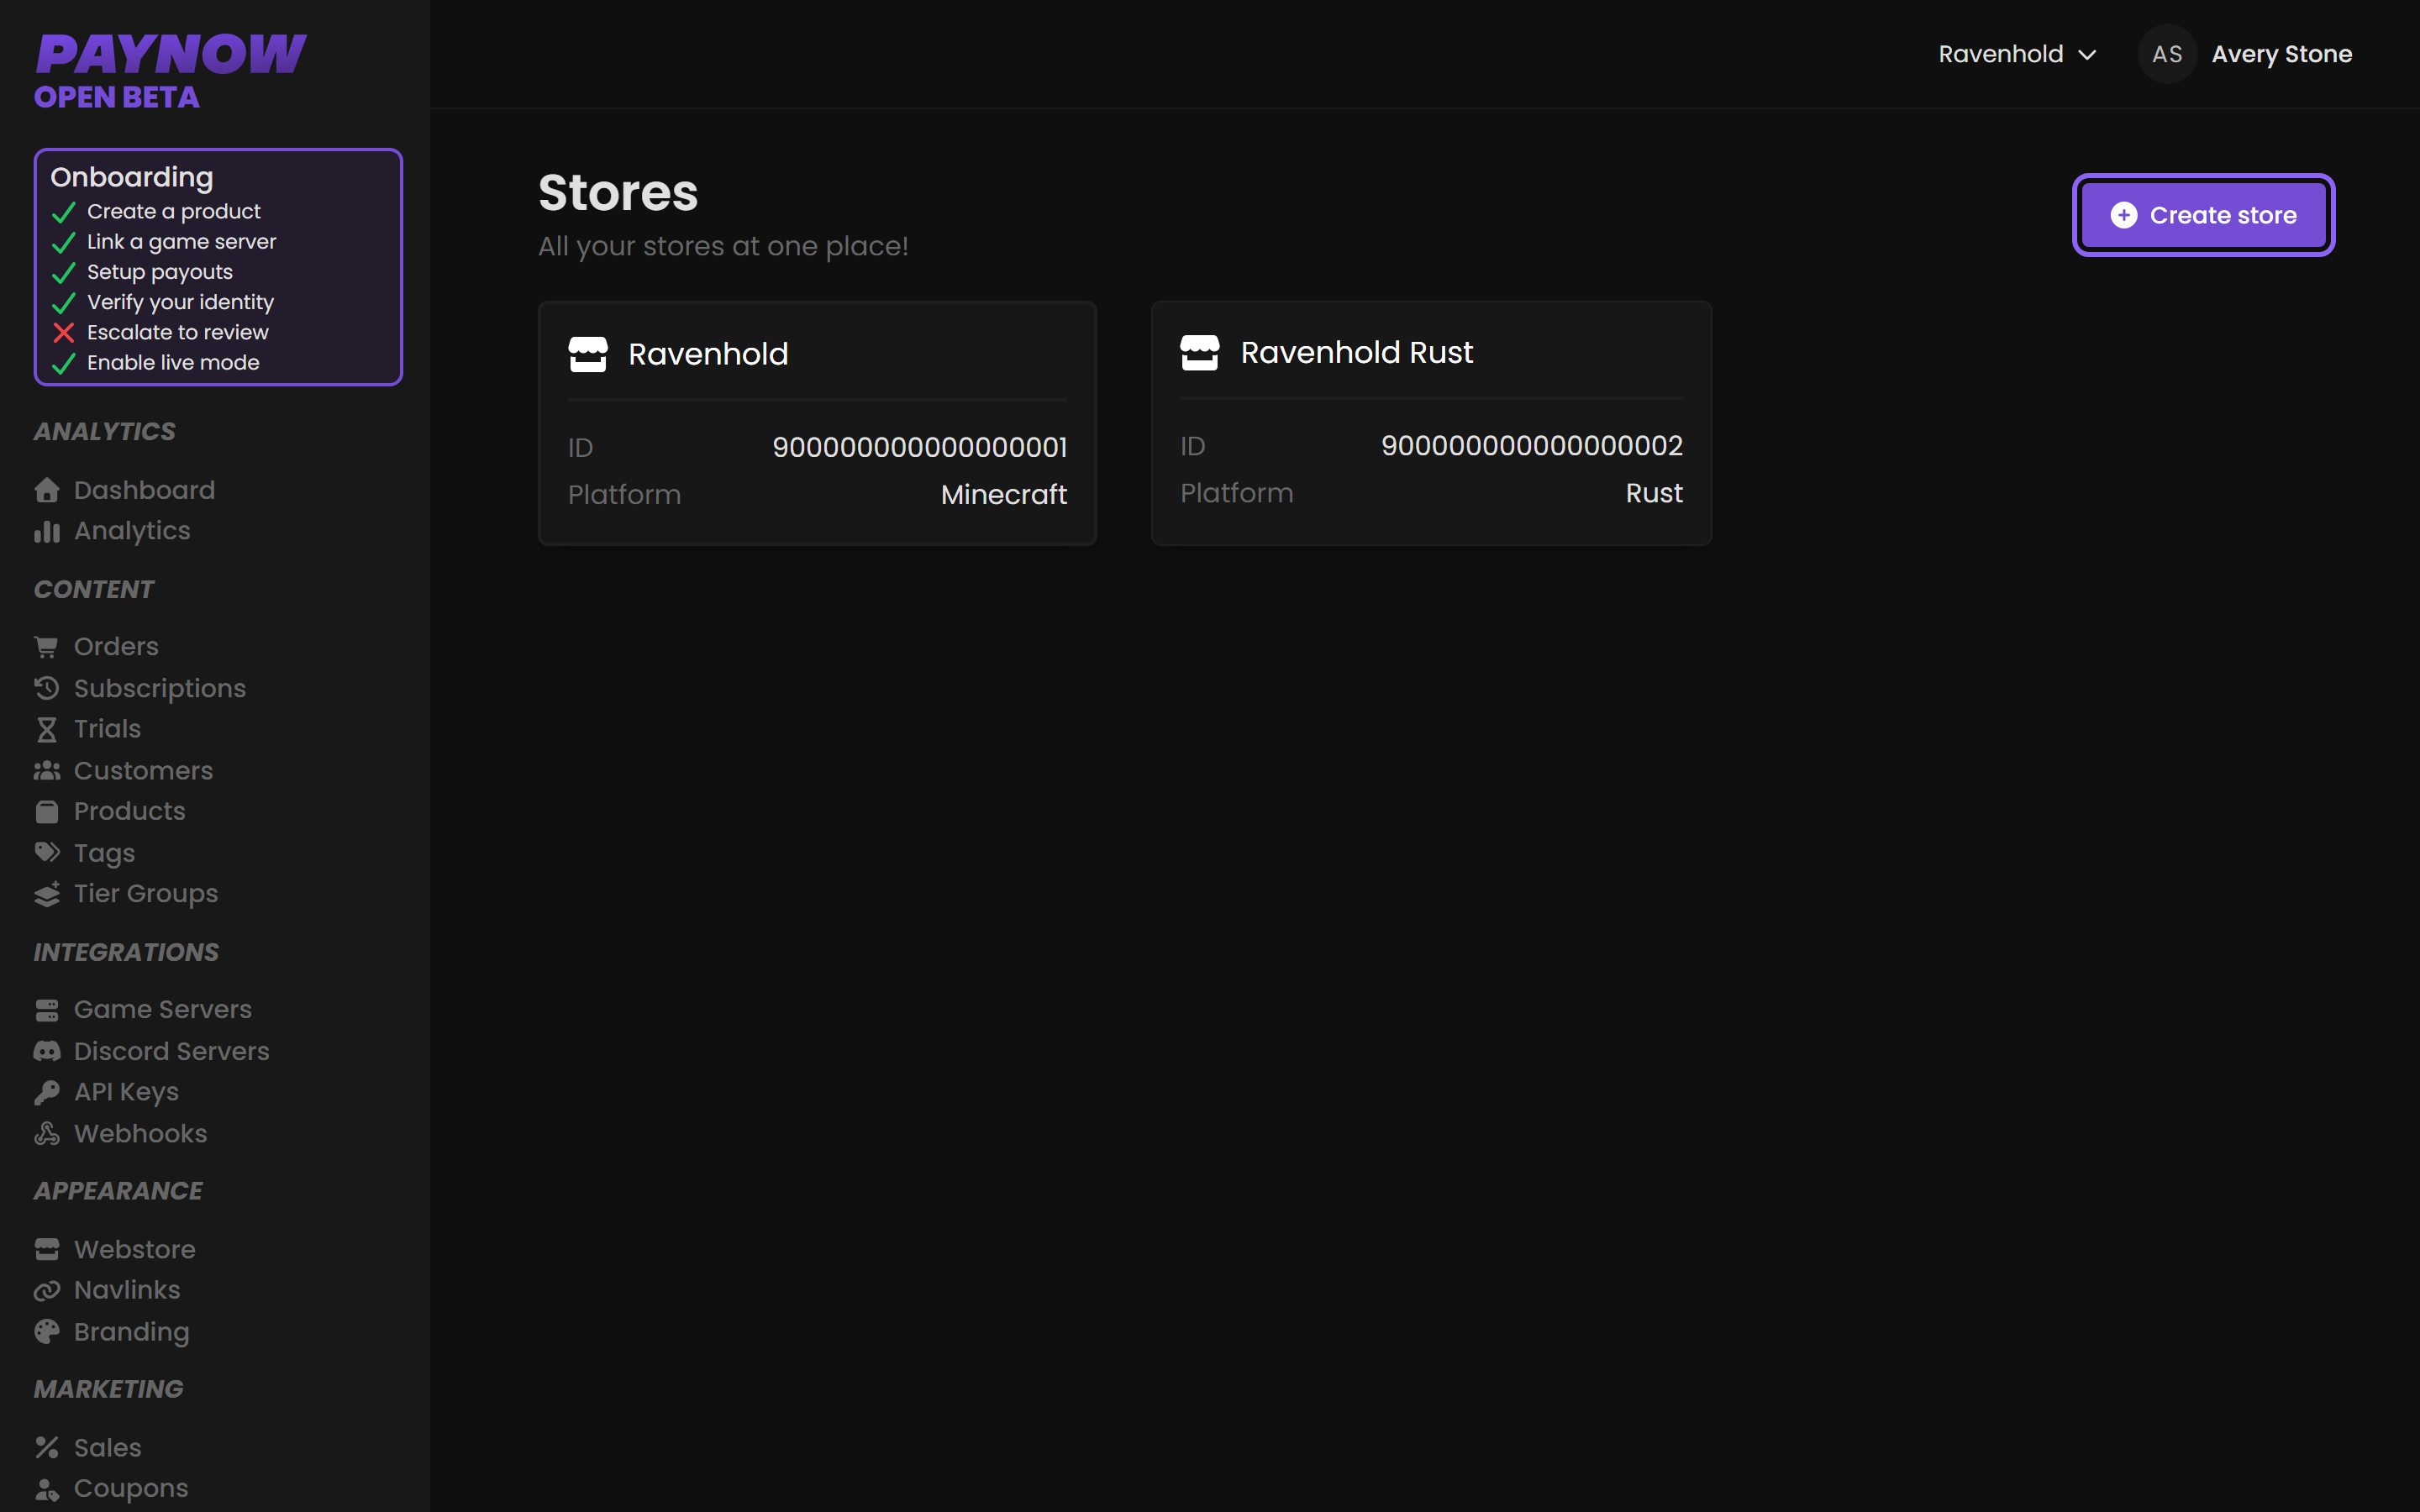
An account with no stores yet goes straight to a Create a Store / Join a Store chooser instead of this list.
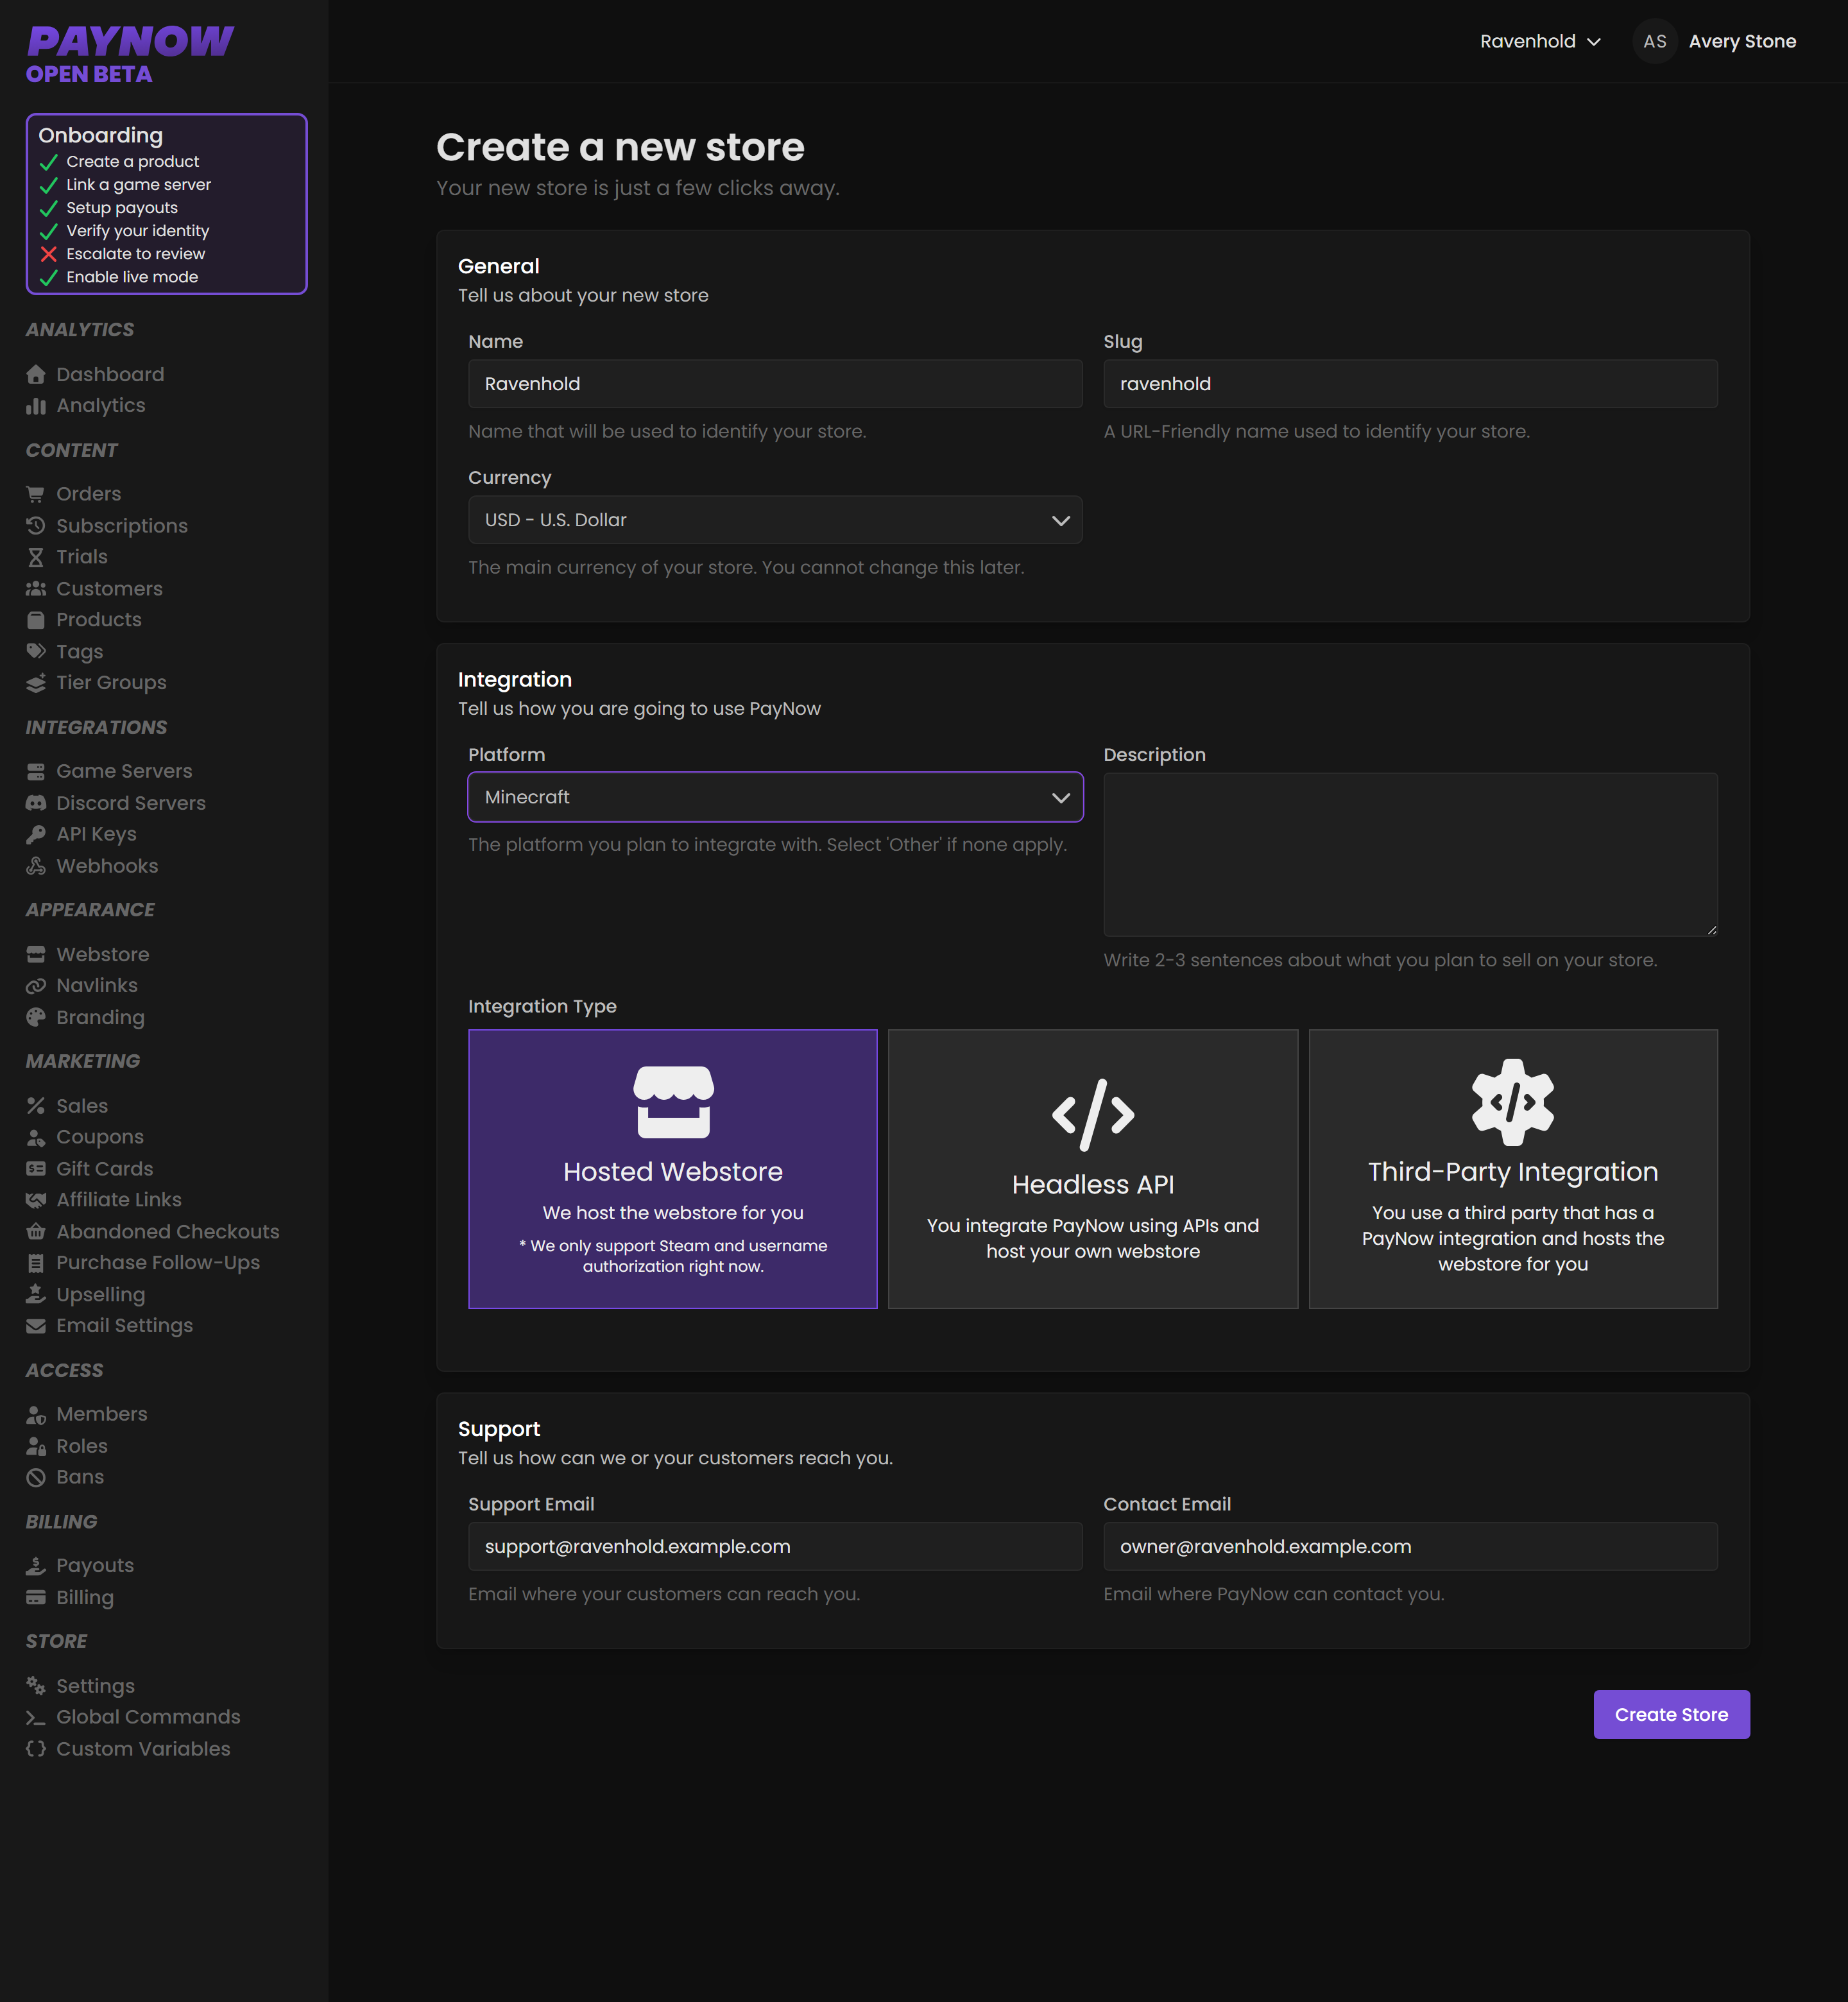
Store fields
| Field | What it does | Can you change it later? |
|---|---|---|
| Store Name | Shown to customers throughout checkout and on receipts. | Yes |
| Slug | Short identifier used in your store URL. | Technically yes, but every link you've shared will break. Treat it as permanent. |
| Currency | What prices are set and charged in. | No. See below. |
| Platform | The game or service you sell for. Customises which store features you get. | Yes, from Store Settings. Switching to or from a third-party integration opens a Platform Change warning: it affects your platform fees and available functionality. |
| Integration type | Hosted Webstore, Headless API, or Third-Party Integration. | Yes, but it changes which parts of the dashboard apply to you. |
| Support Email | Shown to customers. Where they contact you. | Yes |
| Contact Email | Where PayNow contacts you. Not customer-visible. | Yes |
Currency is effectively permanent. It sets what customers are charged in and what your payouts settle in. A global audience doesn't need multiple stores: Adaptive Currency presents local prices on top of your base currency.
Choosing an integration type
| Type | Use when | You manage |
|---|---|---|
| Hosted Webstore | You want PayNow to host and render your storefront. Most stores. | Products, appearance and promotions, all in the dashboard |
| Headless API | You have your own site and want to drive checkout yourself. | Your own frontend; PayNow handles payment and delivery |
| Third-Party Integration | Another platform creates and drives your store. | Very little. |
The six onboarding steps
The Onboarding section walks you through launch. You can leave and come back; progress is saved.
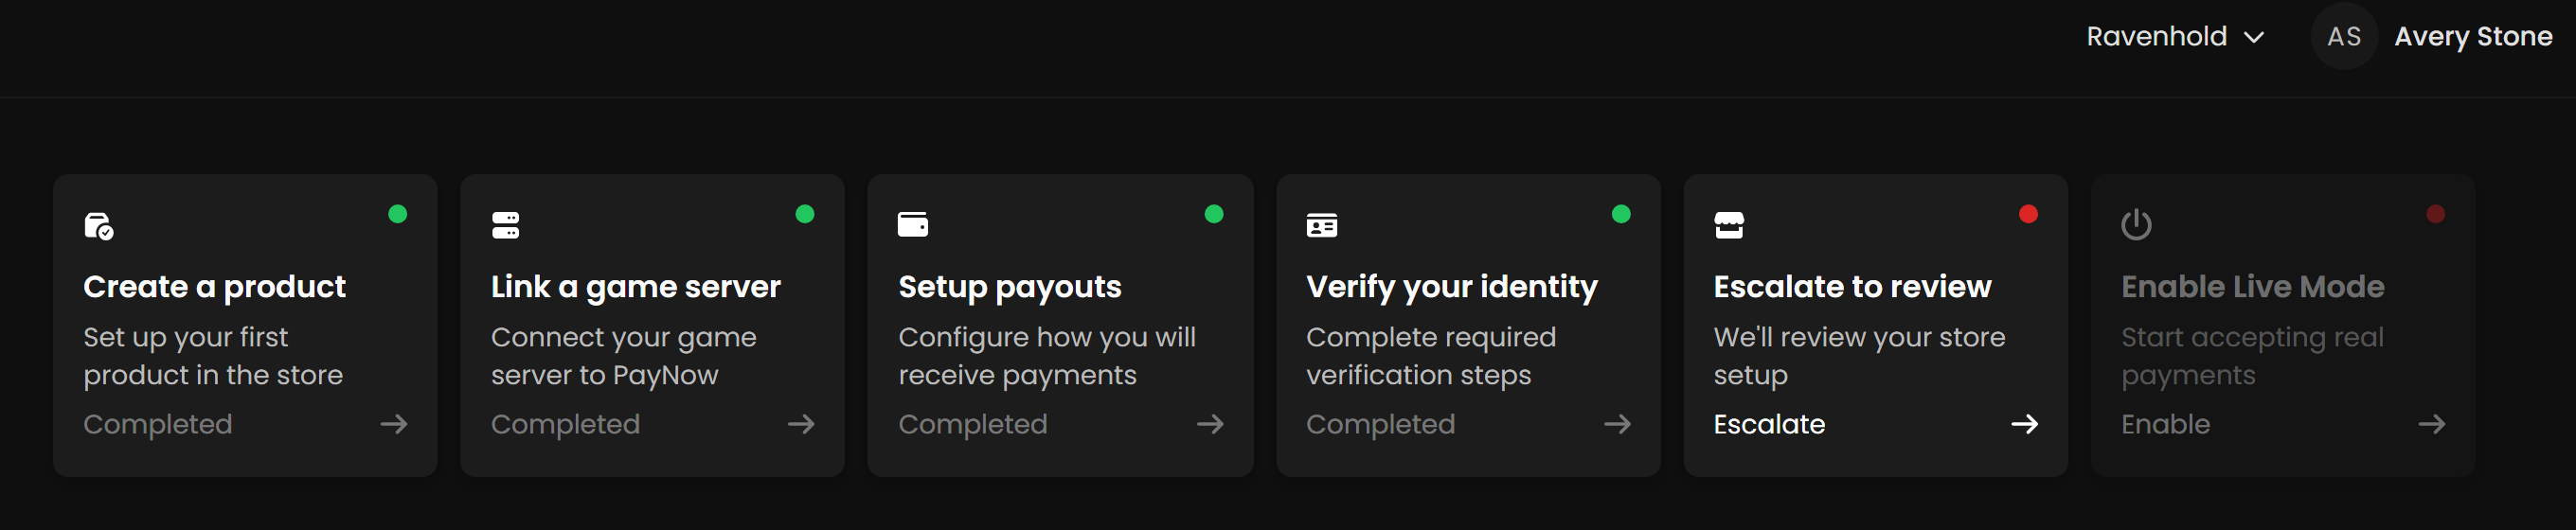
Step 1: Create a product
Your First Product is the quick walkthrough; Creating a Product is the full field reference.
Step 2: Link a game server
Connects your store to the server that delivers purchases. Without it, payments succeed and customers receive nothing. See Game Servers.
Step 3: Set up payouts
- Click Setup Payouts on the Payouts page.
- Work through the wizard: your address (email, phone, postal), your payment method (PayPal, local bank transfer, or wire), your tax forms, then review and confirm.
Tipalti, our payments partner, handles payout onboarding, so this step opens their form. Tax Forms covers which form applies to you; US recipients, individuals as well as companies, receive a 1099-K at year end. The rest is in Setting Up Your Payout Account.
PayPal payouts are only supported for USD stores. On any other store currency, use local bank transfer or wire.
Step 4: Verify your identity
Upload your government-issued ID and any additional requested details. PayNow uses Stripe to run the check, which covers document verification, biometric verification and information validation. It is required to meet anti-money laundering (AML) and know-your-customer (KYC) regulations, payment processing partner standards, and Visa/Mastercard compliance requirements. It usually completes quickly.
This step only becomes available once payout onboarding is complete.
Step 5: Store review
PayNow reviews the store before it can sell. When every other requirement is met, the step becomes Escalate to review and you submit the store yourself; review can take up to several business days.
Step 6: Enable live mode
Once approved, use the Enable Live Mode button on the Onboarding page. Work through the Going Live Checklist first.